Gold & White Stamped Mani (August 2014)

Gold & White Stamped Mani (August 2014)

Monday 29 September 2014

Stamping - 10 Things I Wish I Knew When I Started!

I have practised a lot these last few months, and been given advice both personally and by blogs and tutorial videos. This has all been really helpful, so the only thing I could think to better it, was to try and summarise it all together in one place so that maybe someone else might benefit from it. So, here it goes! I'm sure this entry will be a work in progress, that gets updated over time with extra things I have learned and been advised along the way.


1) Not all nails are created equal!

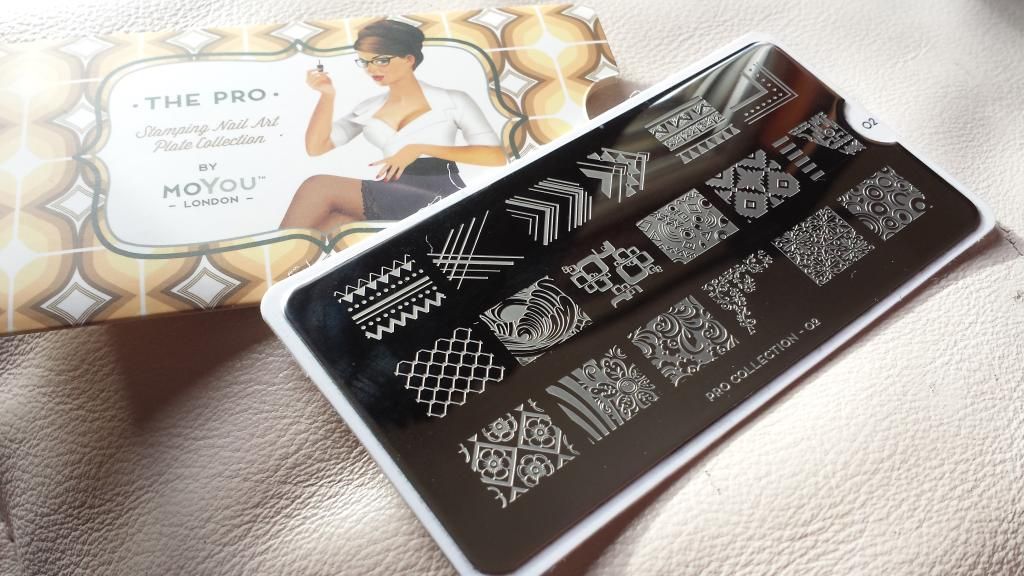
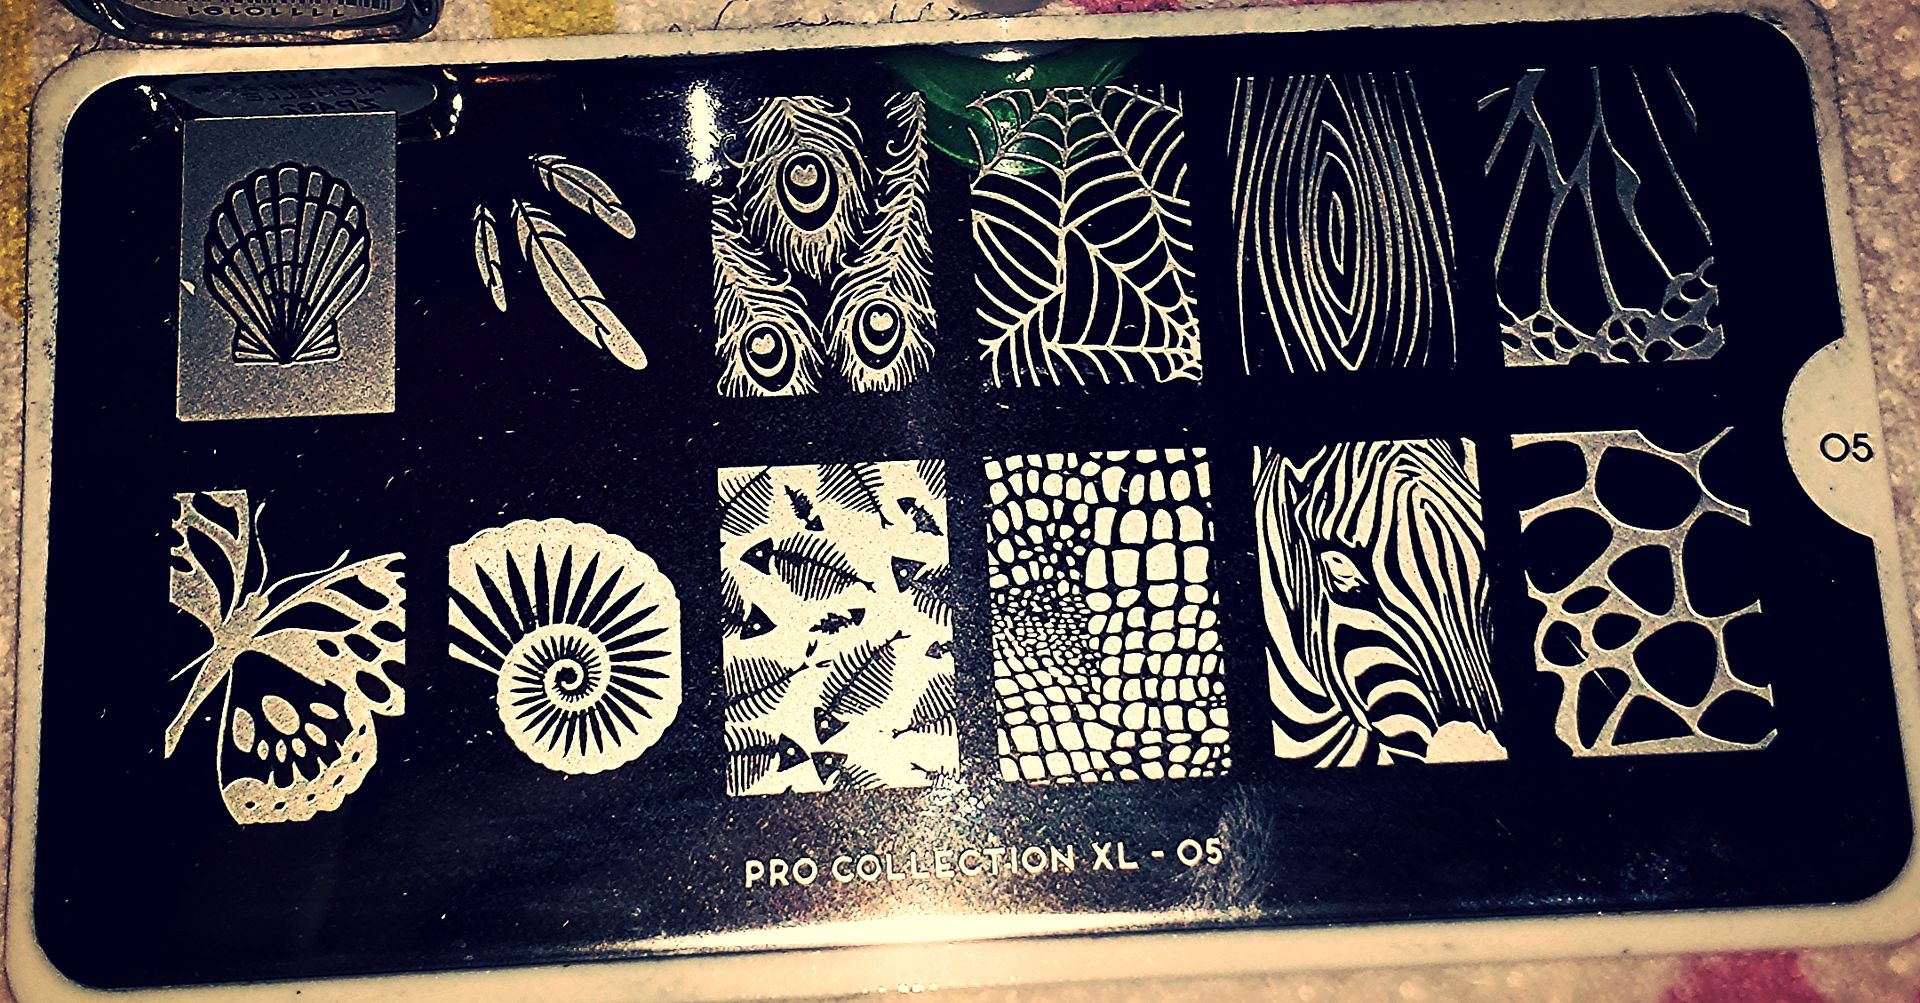
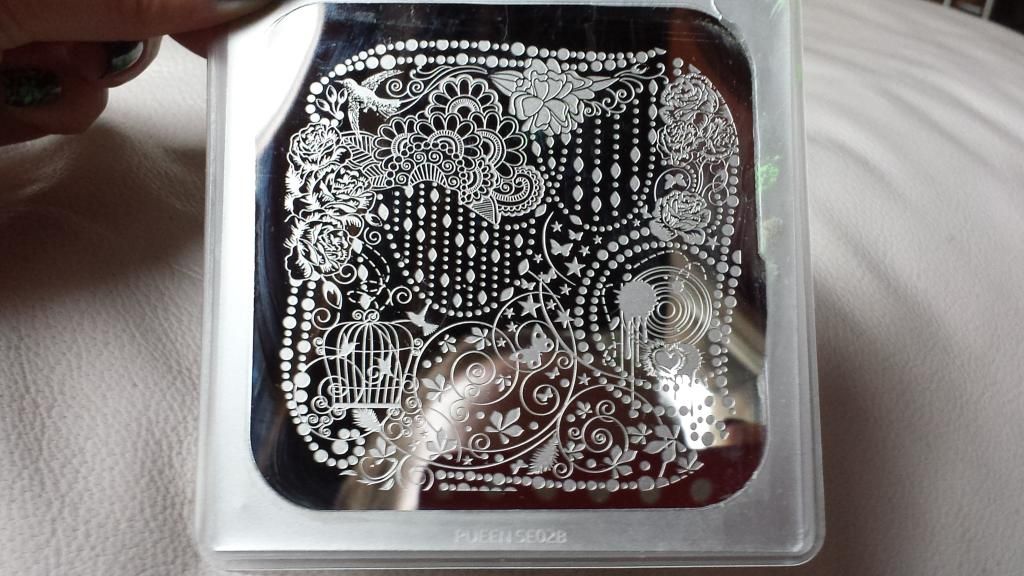
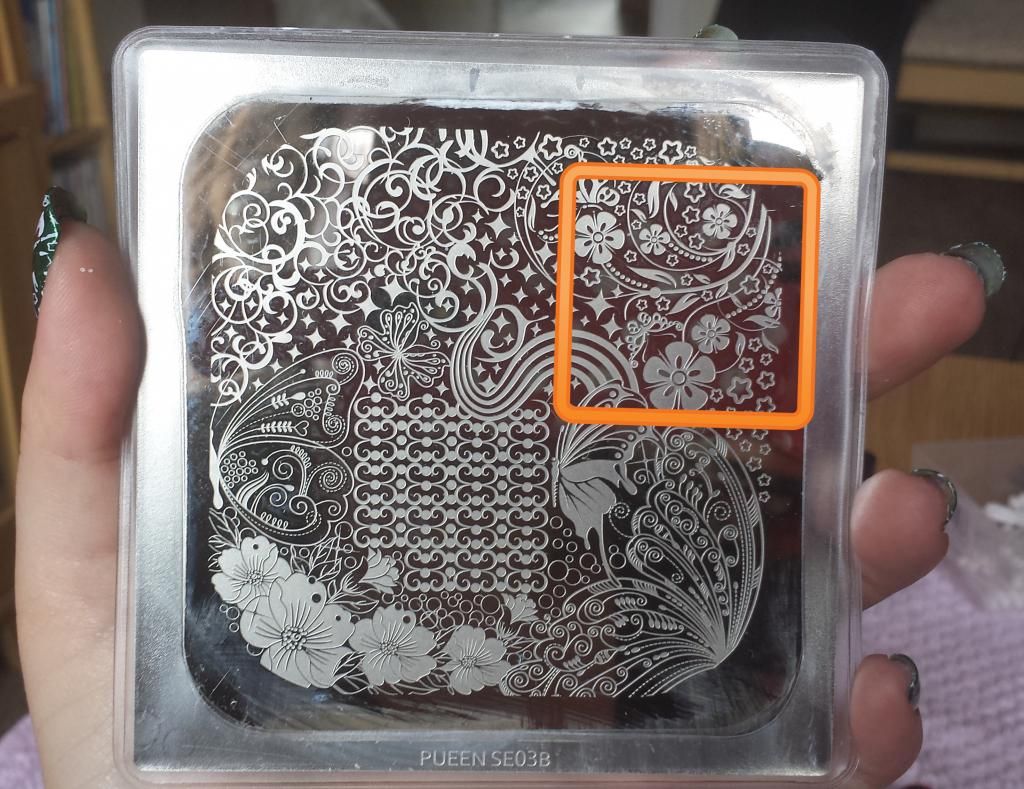
Think carefully about your nails before you even start shopping: how wide are they? How long are they? How different in length do you keep your dominant and non-dominant hands? Is your nail bed flat, or do your nails curve in a C-shape when you look at them end-on? If you think about this first, it should save you from buying the wrong sized plates. Moyou-London for example, do 18 image plates for short, narrow nails, and 12 image plates for long, broad nails; you don’t want to buy the wrong size, and end up with images that won’t fit well on to your nails. Full image plates (where the plate is one continuous big picture, made up of various patterns) are full-proof, but you do still consider the size of the detailing on them. Certainly as a newbie, I found the choice and control of a whole image plate daunting and avoided them, but now I have Pueen’s Encore collection and use them a lot, both using my eye to make sure I keep picking up the same section of the image, or blocking of a section with washi/masking tape, much like a surgeon’s drape. So, be brave - don't rule full image plates out!

Just remember, ALWAYS PEEL OFF THE PROTECTIVE PLASTIC FIRST! You can't pick up a stamp otherwise. This is the stamping equivalent of "Have you turned your computer off and back on again?"


As you can see from almost any post on this blog, my nails are narrow but quite long, so I own both sizes of Moyou plate. (The small images are fine if they are a stand alone image, not a uniform pattern that should cover the whole nail. The bigger images work best as a uniform pattern - I hit issues with them when the image is too wide to fully appear on my nails).

A Moyou-London 18 image plate - my Pro 02. (These are ideal for my right hand with its shorter nails, and for stamping friends' nails, but are not long enough to cover my longer, left hand nails).


One of my large Moyou plates - Pro XL 05. (Whilst the more uniform images on the right work well for me, the butterfly and shells on the left are bit too broad to look good on any nail that isn't my thumb nail). NB: the actual plate itself is the same size as the 18-image plate above.


One of my full image plates: Pueen Encore SE02B. For an example of a manicure using this plate, please click here).


2) The Stamper is Mightier Than the Sword (Almost!)

Don’t assume that the only stamper you have is the only stamper that will work (or fail) for you! I originally had a Poundland kit to try out, and had no luck, giving up on stamping before I had even really began. I then tried a Konad stamper, as it had come recommended and was so inexpensive… boom, I then had my first successful mani! (The change in polish helped too – no longer the white from my French manicure kit, but an opaque silver Nails Inc foil polish that came free with an issue of Glamour magazine). I found being gentler pressure-wise helped too, but I have a very curved nail bed, so rolling the image across always felt precarious with my hard Konad – that one day, perhaps the stamper would slip across my nail. I kept on with the search, finally trying an infamous marshmallow, and found that it picked up like a dream, but also rolled easily across my nail as it clings to its shape. (I now have some squishy firms too, and I still prefer them all to my harsh Konad, which is better suited for a friend's small and flat nails, I think).

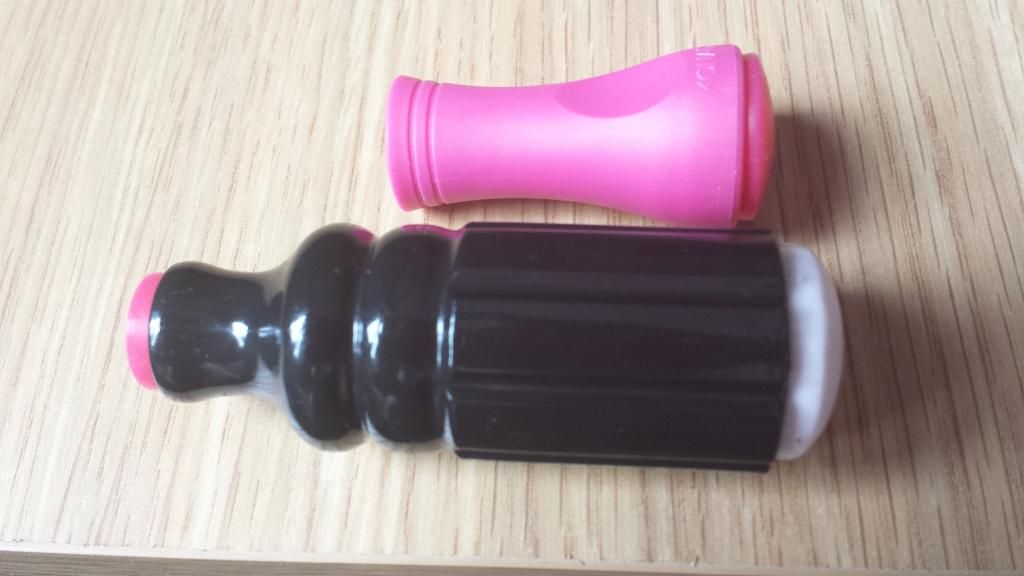
Another thing you need to know is that not all stampers are 'born ready': some need a little priming, as they won't pick up polishes consistently at first go. I have had two stampers like this - the marshmallow below, and my rectangular Moyou stamper (squishy firm). Both have just needed a wash in hot water and Fairy Liquid (dish soap), and with some practising on my technique via paper, they have worked perfectly after that. The next stop if your stamper still won't pick up, is to gently file the thinnest top layer away that you can - across the pond, they all swear by a 'magic eraser' to do this, but a nail file will do the same job. This should always be a last resort though, as you can never undo your filing, and it is easy to take so much off that you ruin its chances of picking anything up. Manic Talons has a good, well illustrated tutorial here to help you along with priming :)

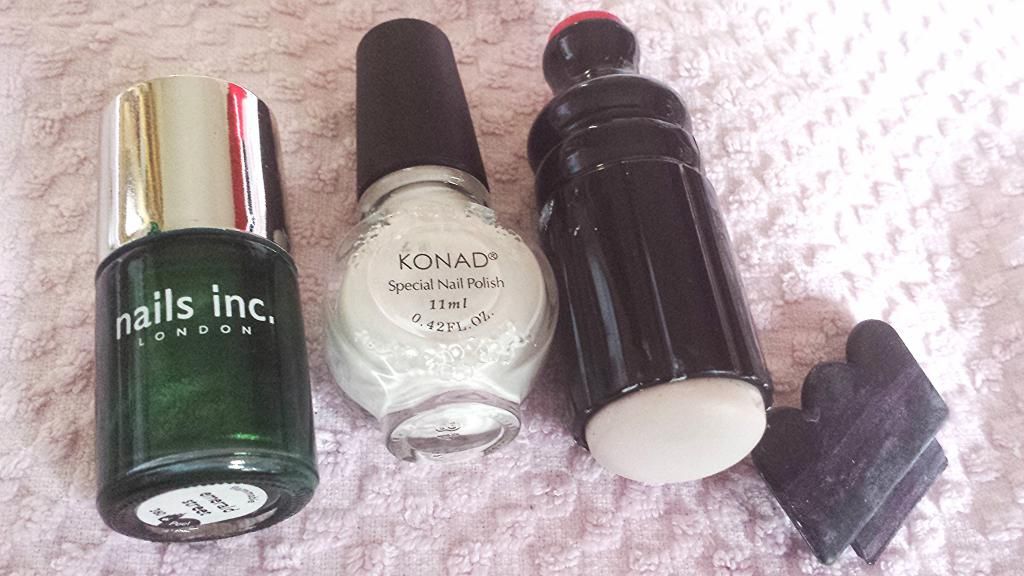
My white marshmallow (which gets dirty just thinking about lint) beside my firm, pink Konad stamper.


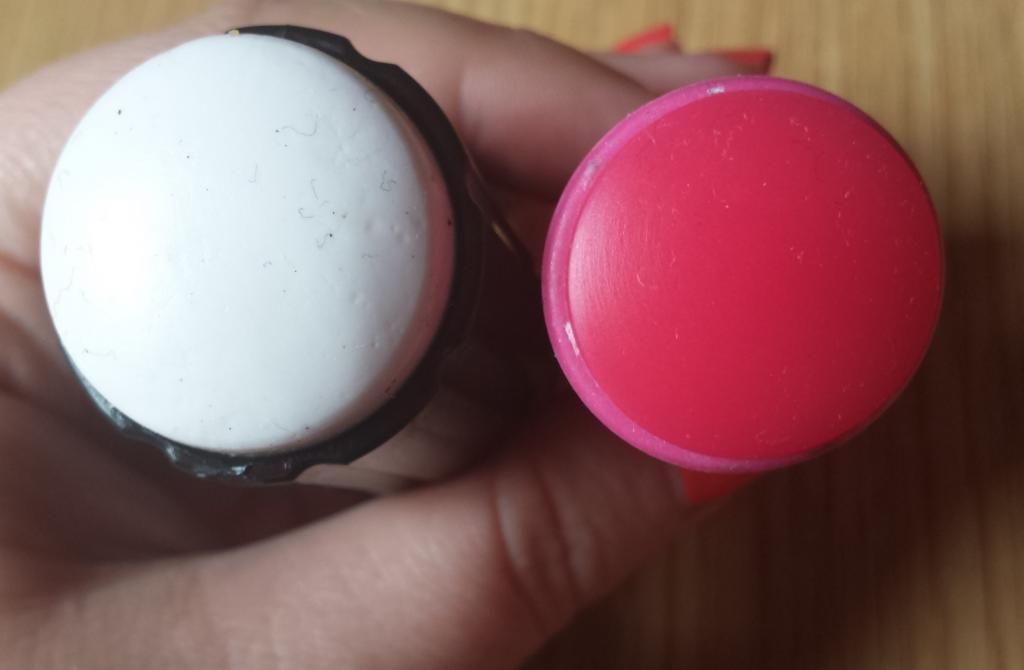
Why a marshmallow is so called!


3) Preparation, Preparation, Preparation!

When are settling down to do your stamping, get everything you need ready before you start! I'll post a photo the next time I stamp in day light, but my prep list contains:

  • my designated 'nail towel' to protect my table
  • pure acetone and glass jar with some decanted in to it (bottle caps are a small but useful alternative, just be wary of how easy they are to knock over/off surfaces)
  • cotton buds for plate cleaning
  • cotton pads for plate cleaning, and for drying off the acetone before I reapply polish to the plate
  • cellotape to clean my marshmallow stamper (NPR is fine for my Konad) and to clean up the excess around my nails 
  • a brush for clean up (mine's a nail brush from Ebay, but am awaiting delivery of an ELF angled brush because it comes so highly recommended)
  • a bin, for the cellotape and cotton buds that can quickly pile up
  • kitchen roll/tissue paper to wipe my scraper on each time I use it
  • my stamping polish(s), with the lid unscrewed and the cap just sitting in place.


4) Don't Underestimate Scraping

Scraping needs to be done swiftly and at the correct angle – if you’re having to do it several times, then you are leaving your polish more likely to dry out in the grooves of the plate. I prefer to use a plastic scraper than a metal one, as it doesn’t leave ugly (but perfectly harmless) scratches on the plate. 45 degrees is the only angle that works for me, and when I give friends manicures, the speed they remark about is usually my scraping speed.

5) Hurry Up!

Work fast full stop! I paint, scrape, and pick up in about 5 seconds, hesitating for a second or two as I stamp (usually putting my finger down on to my stamper where I can see the image, not putting the stamper blindly down on to my finger). For images requiring you to stamp in straight lines, I find a rectangular rather than circular stamper can help with lining up the design more accurately.


6) Your Environs Matters

In addition to working fast, think about where you are working, as that affects drying speed too: being in a draught, beside a radiator, under your air conditioning… anything can make your polish dry up faster than you can pick it up and transfer it, makes your job harder. Don't leave yourself totally unventilated while working with pure acetone, stinky top coat etc though - I'm pretty sure fainting mid-mani isn't recommended either! lol.

6) Top Coat - Gentley Does It Now!

Don't rush the top coat: I usually clean up my nails with the cellotape and the brush (dry brushing at first to clear up the edges, then picking the remainder up by dipping it in acetone and blotting excess off on cotton pads) to give the stamping polish ample time to dry. Also, take your time with the actual application of the top coat, floating  it so that your brush doesn't actually touch the image. (In other words, leave a good sized bead of TC on the brush, set that to your nail, and just use the brush gentley on the bead's surface to move it all the way across your nail, rather than pushing so hard that your brush goes straight down through the bead and touches your stamp. This is especially important with top coats that melt and set your polish, such as Seche Vite and HK Girl, which are fab toppers for stamping, they just need an extra second or two of care).


7) Try, Try Again!

The best but most boring piece of advice is practice, practice, practice! There are no magic words and no short cuts – it just has to be done. Here’s a few sneaky tips that I have picked up along the way though:
  •       Paper is your friend: stamp on to paper, and do so for a whole host of reasons - to check that your polish is opaque enough to stamp with, to check that your new plate is deeply enough etched, to check that your stamper is picking up, to check that you are working fast enough to pick up and stamp down cleanly and crisply, to check that you are using the right technique (rolling side-to-side or up-and-down vs. pressing straight down) along with the right stamper (marshmallow, firm or anything in between) for you and your nails (their width and curvature will affect what’s best for you), to check that you are using the right amount of pressure (less than you might think). Also, invest in some black paper: this lets you know if your polish is opaque enough to stamp over dark colours, as well as over light ones. 
  •       Have an unchipped, plain mani? Stamp it, just before you remove it. There is nothing quite like stamping on real nails; luckily I have keen friends to practice on as well most weekends!
  •      Want to get more practice in but can’t be bothered with all the time it takes to paint your nails first? Treat yourself to a gel manicure (cured under a UV lamp) - these come up in my local area for about £10 on Groupon all the time. You can stamp over the top of these manicures at home, removing and restarting as much as you like as nail polish remover will only dissolve your normal/stamping polish, but not the gel polish the beautician has applied. Some strongly pigmented gels can bleed a little though (e.g. reds), so do let your beautician know, as they may want to cure a second top coat over your manicure just to be sure.


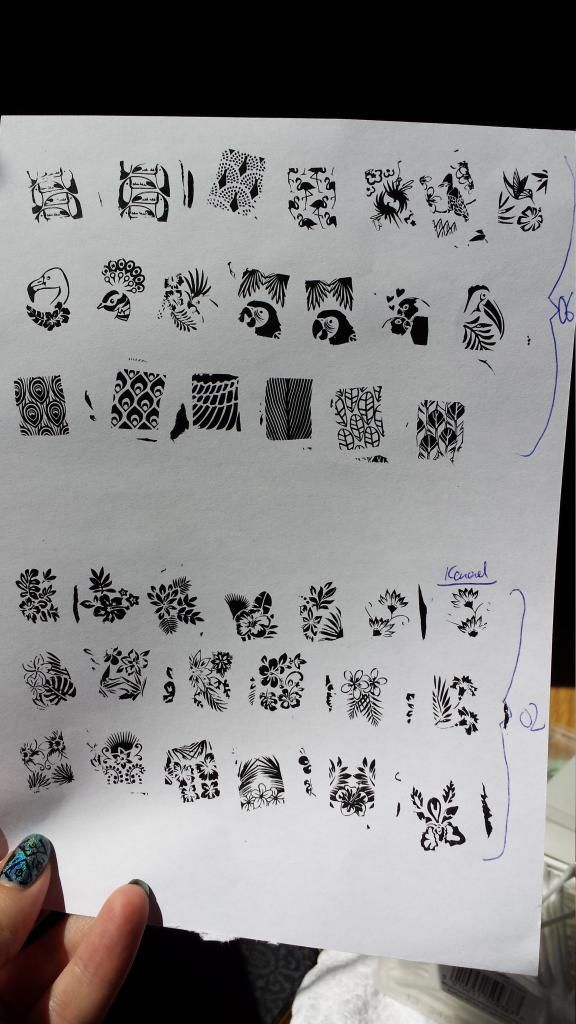
Checking out 2 new plates on paper (Moyou Tropical 02 and 06). Most of these were with my new marshmallow at the time hence giving me more practice with that too, but I did check out a difficult image on 02 with the Konad. A good acetone-clean of the plate and a bit more careful technique meant that I got there with the troublesome flower in the end though (on another sheet of paper).


8) Normal Polishes Can Work, But Stamping Polishes Are an Investment

I won't litter the internet with another essay on normal polishes that work for stamping (see here, for example), but typically polishes that have the following characteristics are good contenders:

  • One coaters: thick and pigmented enough to be opaque in a single coat. Gel effect polishes usually fit this bill (and I love the Barry M Gellies for stamping).
  • Metallics/foils: many people actually find normal silvers and golds (e.g. Maybelline, Barr M, China Glaze) work better than stamping golds/silvers (e.g. Konads).
  • Holographics.
  • Old, thick and gloopy polishes that you thought were destined for the bin
  • Certain brands are also known to work well e.g. Sally Hansen Insta-Dri (often available in Poundland and B&M in the UK), and many (but not all) Sinful Colors (I've seen some of these in Poundland too). Friends across the pond also rate Kleancolor Metallics, but I have never seen them available in the UK.
So, if you're trying out your regular polish collection, this is where practising over white and black paper come in handy, bearing in mind that some polishes will work only over pale colours and not dark ones. Stamping the bottle itself or the lid can be a good way to remind you if that polish works just over light colours (e.g. white stamp) or if it works over both contrasts (e.g. black stamp your bottle).

For white and black stamping, I use trusty Konad stamping polish. The holy grail of specialised stamping polishes are really Mundo de Unas though, available directly from MdU or via Rainbow Connection in the UK. I have 5 minis and love them, but do be prepared for the whiff! Rica stamping polishes have also been recommended to me, but I haven't seen the need to fix what isn't broken with my Konads and MdU.

9) The Common Mistakes We All Make

So, while I think common errors have been implied along this post, it's hard to beat a visible check list to see where you might be making mistakes:
  • Working too slowly: paint, scrape, and pick up within seconds, pausing only to check that your image has been successfully picked up and the alignment on your nail before stamping.
  • Working in the wrong place: remember, don't sit under your air conditioning, in a draught etc, as your environment can affect how your polish is drying.
  • Using the wrong polish: have you done the white/black paper tests, to see if it's opaque enough? Or have you done a test swatch on a nail wheel, with your stamping colour over the coloured polish you are wearing? Are you working at the right speed for the type of polish you have? (Many polishes require fast work, but stamping polishes like Mundo de Unas can sometimes be crisper if left for 5 seconds before pick up).
  • Is your stamper ready to use? Remember to try your stamper out on paper/ a nail wheel before using it for a mani you intend to wear out, as you may find it doesn't pick images up straight away. A hot wash in Fairy (dish soap) usually works for me, but you may need to very carefully file the slickness away (and here's a great tutorial on how to prime your stamper).
  • Misjudging the pressure: are you pressing so hard that you blur the image and are at risk of your stamper slipping? Are you pressing so lightly that you will never pick up all the image? Are you adjusting the pressure for your stamper, if for example, you have just switched from a hard stamper to a marshmallow?
  • Pick-up and transfer technique: are you pressing your stamper directly down onto your plate and nail, or are you rolling the stamper across either/both? You need to find out what works best for you and your chosen stamper, but I found that rolling left to right with my round stampers (both Konad and marshmallow) on the plate and my nail was the right thing to do, but that rolling up and down with my rectangle Moyou stamper works best. (Straight down has never worked for me, but I have very curved nails, so this likely never will; it makes sense to me to pick the image off the plate in the same way that I am going to transfer it on to my actual nails).
  • The wrong stamper: you have worked on your speed, got hold of proven polishes, and still not been successful? Don't despair! In most cases, you have the wrong kind of stamper for your technique, nail shape, or just your preference. There are no hard and fast rules - it's trial and error, so often it means buying a few. I try never to see it as a waste of money though - for doing decals (coloured in stamps - see the pic below), you paint the image in on the stamper, let it dry, and then put it on your nails. It really saves times if you can put the image on to several stampers to paint and dry at the same time, rather than being limited to one image and one stamper! (A tutorial video to explain decals is here).
  • Plate problems: is your plate definitely properly etched? Does it need an acetone wash before its first use? (I find Moyou plates with fine detail benefit from a wipe done with 100% acetone before first use). If I am still failing despite several basic checks, then I change the stamper and scraper, and switch to a polish I know works if I'm having an issue with my current one: if it still doesn't work, then it could be a plate issue, but thankfully this is rare amongst brand names (in a 'you get what you pay for' type way). Also, look up your plate's code/name online: have other bloggers had similar problems too?
Decal photo, courtesty of LuvMyLacquer. Now, imagine colouring in one stamper 10 times and waiting for the layers to dry, versus painting in multiple stampers just the once or twice! 


10) Ask (Preferably Before All Else Fails)

Finally, don't be afraid to ask anyone for help - be it the stamping community in general, or me specifically via the comments. I have learned that there really is no such thing as a silly question: more skilled stampers than me have helped me with stamper recommendations, my technique, suggesting plates that contain a certain image that I'm after, and have inspired me not only with their current creations/works of art, but also by being honest and showing their poorer manicures from when they started off as a newbie too. I think it's important to realise that even the pros make mistakes, so don't let that put you off, and don't be afraid to post things that are short of perfect; they often provide the best way to learn :) I follow blogs but am in a lot of great fb groups for stamping too: just get in touch if you'd like me to recommend you a few for you.


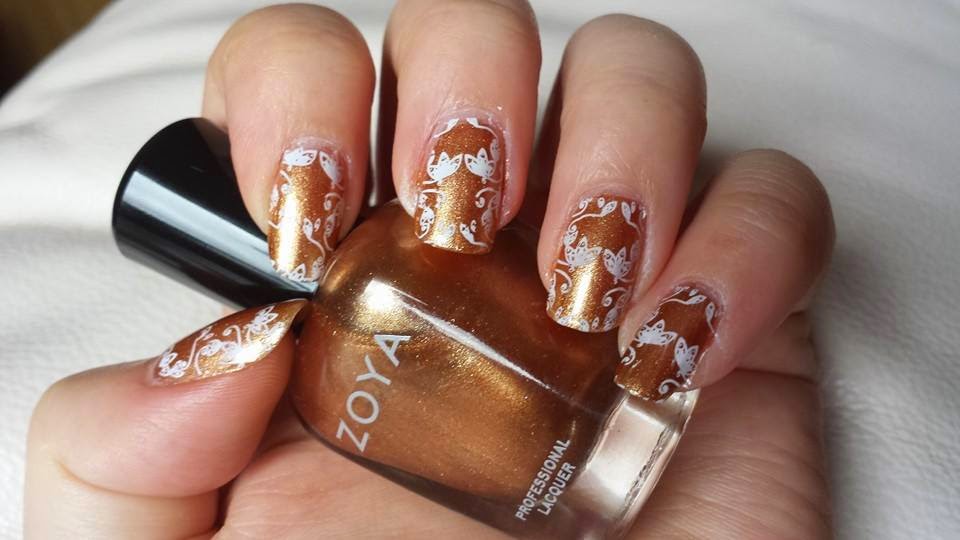
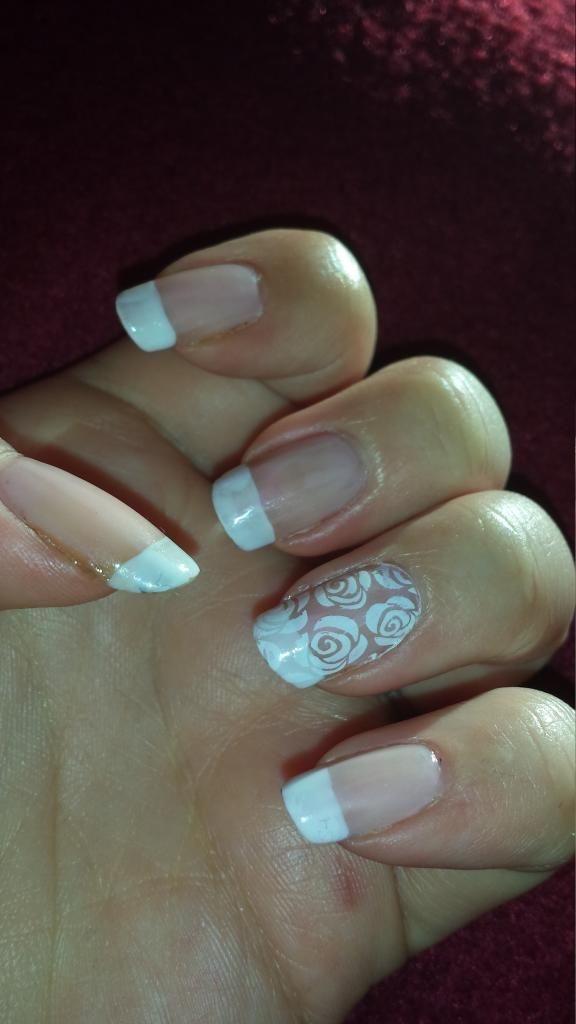
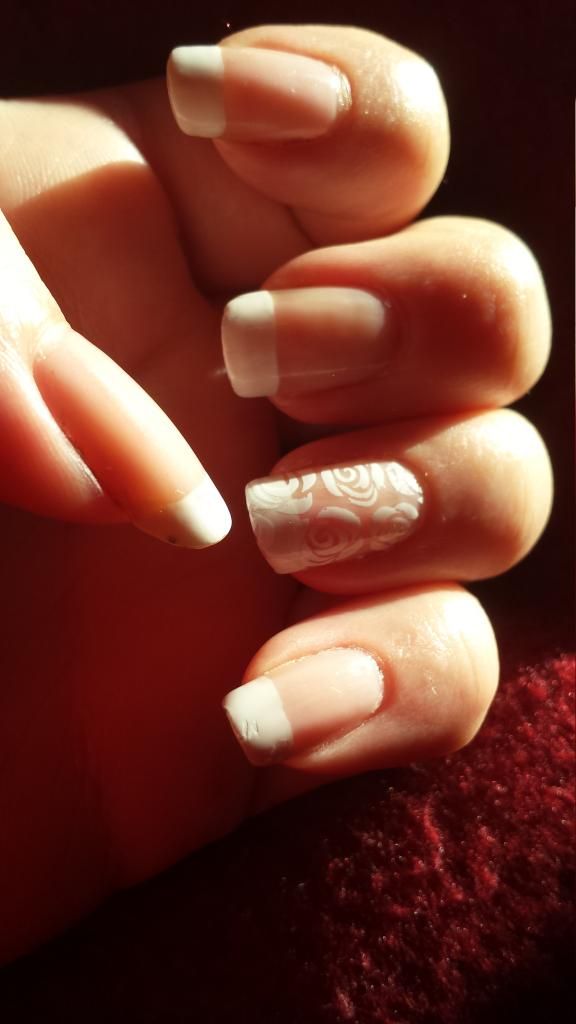
The first stamping manicure that gave me hope (Xmas 2013), using Barry M Gelly in Guava, Nails Inc silver foil, and a Moyou Pro XL plate (I don't have the details, as I wasn't even thinking of blogging back then):


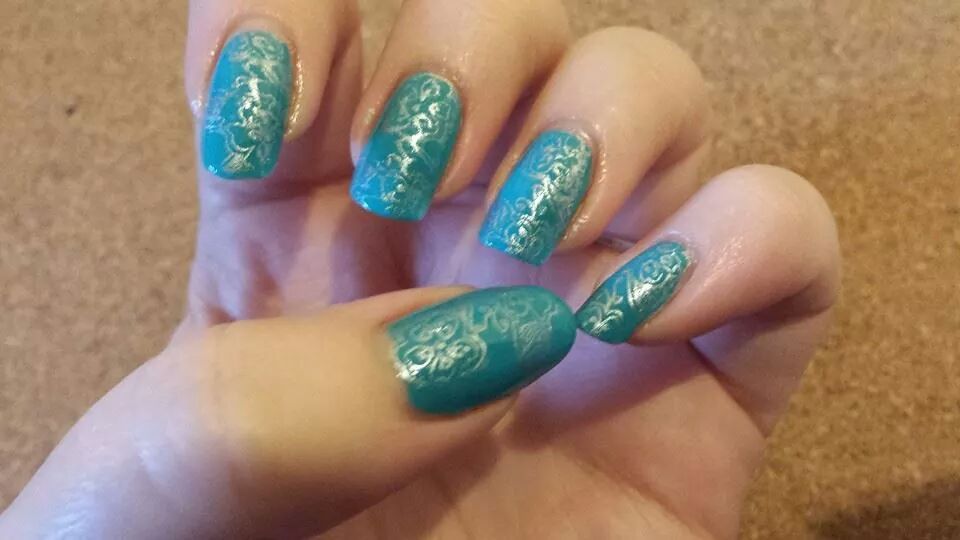
The first manicure will all the correct kit for my nails (Konad white, a marshmallow stamper, plastic scraper etc). Again, pre-thoughts of blogging, so lacking details (but it was a Moyou Pro XL plate, Nails Inc green that bled in to yellow after using Seche Vite top coat, hence the pre-clean up photo to show the colour change at my cuticles):


So please, feel free to get in touch with questions, comments, or your own tips for getting things right :) Or, why not do your own 'then and now' post and share the link with us, to see how far your stamping has come along, and give all of us still on the learning curve even more hope that practice really does make perfect?! :)

Wednesday 24 September 2014

September Challenge, Day 24: French Manicure

A very quick post during my tea break, showing how a 'zhoozhed' up a French manicure using a stamp - my favourite rose pattern from Moyou Pro XL 07.

Moyou-London's official picture of the plate (and I used the bottom row, second image in):


So, I'm not usually a fan of weird and wonderful coloured tips on French manicures - I like them traditional or not at all. Well, at least I thought I did, but having seen some lovely stamping such as Tina's here, I do feel it's an option I need to play with more in future

So, for this mani I used Nails Inc Elizabeth Street as the nude pink, and Zoya Snow White for my tips. The roses were stamped with Konad white.  Sadly, I was photographing on the fly, so it's not the best lit - apologies for that!

Before stamping (with flash):


After the addition of accent roses on the ring finger:


In dappled, evening sunlight:


While I don't think I've photographed this well and you can see the day's wear on the tips, I like it a lot... in fact, I think it's a contender for my bridal manicure (given that in my head, that's always been a French manicure, perhaps with room for a subtle twist, particularly a lace-type design on the ring finger). So, I'm still not ready for overly busy or colour twists on a French mani, but I am enjoying dipping my toe in to a brand new pool for now :)

Remember to keep up to date with Tina's challenge here, and see what us fellow participants are doing here. Thanks for reading! :)

Monday 22 September 2014

September Stamping Challenge: Day 22 - Partial Stamp

So another day, another mani for Tina's monthly challenge, and this is a technique I have been meaning to practice for a while as it takes careful placement - using a stamp that only covers part of the nail. (To see what the other participants have been up to this month, find them all listed here).

I started by choosing a polish I owned but hadn't got around to wearing yet - Color Club Cherubic, a nude shade holographic. With a subtle, taupy shade, a stamp with fine detail felt appropriate, so out came Moyou Pro 02, and the 2-sided partial on the bottom row.


As well as Cherubic and the Pro 02 plate, I also used Konad black stamping polish, OPI Matte Nail envy (base) and HK Girl top coat.


I try to take photos in natural light, but with a holo, I have included the obligatory 'with flash' photo!
I do rather like the understatedness of this mani; I just need some more placement practice :)

Natural, direct sunlight:


Natural but indirect sunlight:


With flash:


As always, thanks for looking, and please feel free to leave a link to your blog in the comments, so that I can see what you're up to as well :)

Thursday 18 September 2014

September Stamping Challenge: Day 18 – Leaves


So, I have finally managed to get another of Tina’s great suggestions on my nails, albeit on the day suggested.  Oops! With the time to do 1-2 manicures per week though, that was to be expected.

I was excited about today’s manicures as it uses one of my staple polishes – a navy with green shimmer (Nails Inc New King’s Road), it was my first time using a mini Mundo des Unas polish that I got recently from Rainbow Connection (38 – Neon Green), and it was my first time using the Pueen Encore plate SE02B (and I’m still enjoying the choice and challenge of using full image plates). This photos have been a bit rushed, so pardon the fact that clean up isn’t finished and that I haven’t oiled my cuticles yet!


The list of ingredients should come as no surprise:  

  •         (OPI Matte Nail Envy as a base coat, HK Girl as top coat)
  •      Nails Inc New Kings Road
  •         Mundo des Unas Neon Green (38)
  •      Pueen Encore SE02B


September Stamping Challenge: Day 16 - Rainbow

Apologies for my tardiness in posting, but life has been busy! I have finally done one of Tina's set manicures on the relevant say - a rainbow manicure. I just can't believe it's taken me 2 days to post it! (Voting in Scotland's Independence referendum first thing this morning has paid off by giving me more time to spare than anticipated).

So, I don't have a rainbow on my plates to make a stamping decal from as it's not really my cup of tea. I took a different approach though: to go rainbow with the colours themselves and create a skittle mani. Once I had the colours on, the plate pretty much decided itself: Moyou Tropical 02 and its exotic summer flowers just spoke to me!

The ingredients list is a bit longer than usual:
- (matte OPI Nail Envy base and HK Girl top coat)
- Nails Inc Seymour Walk (pink), Royal Botanical Gardens (powder blue), Notting Hill Carnival (yellow), Mornington Crescent (orange) and St John's Wood (heather).
-Moyou Tropical 02

(Apologies for any poor formatting - the mobile app really isn't all that great for Blogger)!

Wednesday 10 September 2014

September Stamping Challenge - Day 8: Inspiration Mani (Clothing)

So, once again I looked to Tina's wonderful list for stamping inspiration, and found myself sadly lacking in dragon stamping plates. So, what did I do instead? Well, I copied the clothing I was wearing of course!


My favourite every-day top is a forest green and white patterned long t-shirt:


I also think dark greens are under-rated as a nail colour, with black and navy seeming more popular for people going for dark shades. While I had originally planned to use a Moyou plate and then use a dotting tool to add the spots, I had a look through my brand new purchase - the Pueen Encore plates, and found this pattern! Not an exact match by any means, but has 5 petal flowers including stems, foliage and some dotting.


So, here is the resulting mani. It is far from perfect: I didn't always pick up well, but find it so hard to see the white Konad polish against my white marshmallow stamper. If anyone can recommend a coloured marshmallow, please do let me know! I do like the bit of variety in which part of the image I placed where on my nails (I would have used masking/washi tape if I'd wanted the same uniform pattern and placing across my hands). Given it's my first time using these plates, and my first time using a full-image plate, I'm happy enough :) Half the fun is in the practising along the way anyway!


The main ingredients were:
-Nails Inc Emerald Street
-Konad White stamping polish
-Pueen Encore plate SE03B
-(OPI Matte Nail Envy and HK Girl as base and topper)


Thanks again for looking :) Don't forget to check up on Tina's progress here, or see what my fellow participants are up too as well (listed here).

Saturday 6 September 2014

September Stamping Challenge: Day 6 - Flamingos

So, I had a look at Miss Tina's suggested daily list, and Travel is her theme for today (http://madricka.blogspot.ca/2014/08/september-is-stamping-month-mani-challenge.html?m=1). I don't own travel-themed plates per se, so started to think about what I might see on holiday that I don't see here. Well, flamingos are not native to Scotland and are on my gorgeous Moyou Tropical 06 plate. Decision made!

The mani has a few added bonuses too:
  • it was quick, as only 2 fingers are stamped. (Given that I am riding with 200 other horses and riders through Edinburgh tomorrow, ensuring the boundaries of the city are still secure as per olden times, I will only ruin it when saddling up anyway! http://www.edinburghridingthemarches.co.uk)
  • it uses my fave polish: Essie Cascade Cool. This polish looks so unassuming in the bottle, but is the perfect blue-toned pink for my skin tone.
  • it uses the sparkly pink Insta-Dri polish I picked up in Poundland this morning. All North American bloggers swear by them, so it was nice to find them to play with in the UK for £1!

.I meant to do all of this manicure facing outwards, but totally forgot myself when stamping my ring finger. Oops! (I did remember for doing my right hand thankfully, it just doesn't look as good as I'm right-handed).


The ingredients (below) are:
  • Essie Cascade Cool and Zoya Snow White as base colours
  • Sally Hansen Instra-Dri Pink Fast and Konad White for stamping
  • Moyou Tropical 06 and my Chinese marshmallow for stamping
  • (as ever but unphotographed, my base was OPI Matte Nail Envy, and HK Girl was my top coat).


(Please excuse any lay out errors: I posted this using the Blogger App for the first time, and even from my laptop now, moving and changing the photographs seems impossible).

Tuesday 2 September 2014

September Stamping Challenge: Day 1 - National Symbols

So, I am taking part in the lovely Miss Tina's stamping challenge this September (Tina's September Challenge), as often as I can (sadly not daily). I don't have huge variety in my plates yet, and I pretty much live in flower and butterfly manicures, so can't stick to this fabulous guide Tina has come up with. So, I'll try and do some from Tina's list, and some of my own as time and my imagination allow.


So, today's manicure is a floral one, but the theme is one of Nationality (not mine, might I add) - in fact, it's Malaysian in origin. So, how did an Irish girl living in Scotland dream this one up?

Well, on Sunday night, I watched the Edinburgh End of Festival Fireworks and concert. The finale was played out to Tchaikovsky's 1812 overture (the Scottish Chamber Orchestra did an amazing job, as the the pyrotechnics team). I have listened to this piece of music countless times over the years, but never before had the hints of La Marseillaise, France's national anthem, stood out so well before, as the fireworks reflected the colour and formation of the French flag. So, while watching these fireworks with my friends from China, Malaysia, Indian and England, National Colours and symbols came to mind. When it came up that the national flower of Malaysia was the hibiscus, and the flag was mostly red and white (with some blue and gold too), my mind was made up!

Hibiscus Flower

Malaysian Flag

So, here's the list of ingredients that went in to my manicure (left to right):
-OPI Matte Nail Envy base coat
-Nails Inc Greenwich Market polish
-Konad White stamping polish
-HK Girl top coat
-Stamper and scraper kit from China (marshmallow)
-Moyou Pro XL 13 (top row, 4th image from left)


(I should say that, unless stated otherwise, all my manis on this blog use Nail Envy as a base, HK Girl as my topper, and this marshmallow stamper and plastic scraper as my tools).

So, here is the finished article. Sadly there wasn't great sunlight to catch the full beauty of it, and I'm still learning about placement, but I for one think it's pretty, as do my OH and several strangers so far!


Thanks for taking a look! Feel free to leave a comment so that I see your blog too :)